Showing posts with label Google Slides. Show all posts

Saturday, October 1, 2022

Update to Instagram Template

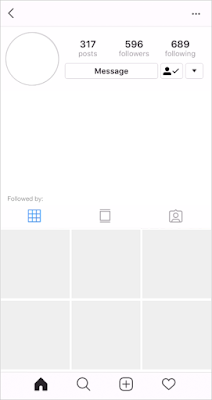
It was that time again to update my Instagram template.  The last version was 2019 and the 2022 version is just a little bit different.  I hope you enjoy this fresh template!  Tag me on Twitter or Instagram and show me how you use it!

                                                         
There are 6 different slide layouts for you.  A blank one each of the posts and both profiles and then also one of each with instructions on the sides.  Like this:


If you go up to the layout button across the top, you can choose from all six layouts:


You can view the new template by clicking here.  If you'd like to use it, click on the blue "Use Template" button and it will make a copy for you.  You can see my original post about how to use a template like this in the classroom by clicking here.  

Saturday, February 1, 2020

Save Time With Bookmarks: Document Templates

I don't know about you, but I use Google Slides for #allthethings.  I am constantly opening Google Slides and then changing the size of my slides.  I realized, with a simple two minute investment, I can save time and clicks each time I need a Google Slides file sized a certain way.

You can do this with any size, but I am going to show it with the three documents I use the most, 8.5 x 11 portrait and landscape slides as well as a landscape document.  Portrait documents are default so I didn't need a shortcut for that.

Step 1:  Create a folder in your Google Drive and call it something like Templates or Shortcut Templates.  This will give you a place to store these template documents you are about to create so that you remember what they are for.

Step 2:  Create a folder in your bookmarks bar.  You can do this by right clicking on the bookmarks bar and choosing "Add folder".  Name the folder "Templates" or whatever you wish to call it.


Step 3:  Inside the folder in your Google Drive that you designated for the templates, create a new Google Slides file.  Rename the file to be "Portrait Slide" (or whatever you want to call it).

Step 4:  Change the slide size to be 8.5 x 11 to make a portrait slide set.  You can do this by going to File --> Page Setup and choosing Custom.  Then change the units to inches and set it to 8.5 x 11.


Step 5:  Now that you have your portrait sized slides file, click on the little star to the right of the web address in the address bar to create a bookmark for this page.


Step 6: Change the Folder option to be the Templates folder you created in step 2.  Then before you save, click on the "More" button to get more options.


Step 7: Name the bookmark whatever you wish.  Then look at the URL (web address).  At the end of the URL, there will be something that says "/edit...".  It might have some other characters after it, but that is ok.  Change the /edit and everything after it to say "/copy" and then click "Save". See the pictures below.  


Step 8: Now repeat steps 3-7 to create bookmarks for a Slides file that is landscape and a Google Doc that is landscape.

There you have it!  Now whenever you want a Google Slides or Document file that is one of those sizes, you just click on your templates folder on the bookmark bar.


When you click on one of your template shortcut bookmarks, it will prompt you to make a copy of your template. 


Now you'll have your already resized document and be ready to go.  It took a little bit of set up, but so many clicks are saved each time you do this.  Enjoy all your extra seconds.  :)


Thursday, October 31, 2019

Pinterest Template

I have so much fun making templates in Google Slides that when a friend of mine asked for a Pinterest template, I couldn't let the opportunity pass me by.  Here is what I came up with:


and...


As you can see, I made a template for an actual board, and then also one for all the little boards if that is something you might need.  I had a ton of fun with this one.  Thanks, @EdTechAri, for the reason to have a little fun with Google Slides. 

Click here to get a copy of the template.  Just click on the blue "Use Template" button in the upper right.  

Click here and here to learn more about editing the Master Slide, which you might want if you need to edit the portions of the template that are hidden in the background.

If you find a fun way to use this template, I'd love to hear about it in the comments.  


Thursday, April 4, 2019

Google Slides: Insert a Video

With just a few clicks, you can insert a video from YouTube or from your Google Drive into a Google Slides presentation.

  1. Open up a Google Slides presentation.
  2. Click on the "Insert" menu and choose "Video" from the list.
  3. Choose where the video comes from.  Are you going to run a YouTube search, paste in a YouTube URL, or search for the video in your Google Drive?  Choose the correct tab for your choice.  
  4. Click on the video you wish to use and click on the "Select" button.


If you use a video from your Google Drive, remember to adjust the sharing settings on the video file itself so that others who view your presentation can also view the video.

Thursday, March 28, 2019

Updated Instagram Template for Google Slides

So many of you have loved my Instagram Template post, that I thought I'd give it a little updating.  I created a brand new template to match the newest version of Instagram.  I have included the template for an Instagram post, as well as two different templates for an Instagram profile page.  Here are some images of the new template:


There are 6 different slide layouts for you.  A blank one each of the post and both profiles and then also one of each with instructions on the sides.  Like this:


If you go up to the layout button across the top, you can choose from all six layouts:


You can view the template by clicking here.  If you'd like to use it, click on the blue "Use Template" button and it will make a copy for you.  You can see my original post about how to use a template like this in the classroom by clicking here.  

Saturday, May 19, 2018

Student Made eBooks with Google Slides

Google Slides is not just for presentations - it does so many things!  One thing you might not expect to be able to do with Google Slides is make eBooks.  Guess what?  You can!  The best part is that it's very easy for you and your students to create beautiful looking eBooks using Slides.

eBooks can be a great activity for many purposes at any time of the year, but can often come in handy as an end of the year review project.  With Google Slides, students can be creative with their images, fonts, and even embed videos or other web links into their eBooks. When students are finished creating the books, they can embed the Slides files in a digital portfolio or other class website.  They can even download the Slides file as a PDF and now they have a book anyone can read on any device!

Here are a few very simple templates I made using Google Slides that you and your students are welcome to use.  They can add to them and get as creative as they would like.  Click on the links below to view the templates.  To use the template as your own, click the blue "Use Template" button in the upper right.

eBook Dark - Landscape
eBook Light - Landscape
eBook Dark - Portrait
eBook Light - Portrait 

eBook Activity Ideas:
  • Creative Writing/Fiction - example embedded below
  • Historical Fiction 
  • Informational Pamphlet
  • Non-Fiction Book (Great for science and Social Studies topics, reviewing animals, space, chemical and physical reactions, historical events, places, and people, etc.)
  • A book of story problems complete with answer key
  • Poetry
Creative Writing/Fiction eBook Example


Be sure to check out a few of my other posts about creative ways to use Google Slides!

Friday, March 23, 2018

Google Slides: Using Theme Builder

Sometimes you want students to have a specific layout in their presentation, or perhaps there are certain shapes, images, graphic organizers, etc. that you'd like to have in the background of a Slides presentation for the students to use as an assignment template - Venn Diagram, specific questions you want to be answered in a certain area of the slide, etc.  This can all be done easily by editing the theme of your slide deck, which holds all the master layouts.  Anything you place in the Theme Builder slides will become part of the background of the slide and students can't accidentally delete it.  You can even choose the default font style, size, and color.  Watch this short video to see how.  Then let your imagination run wild with possibilities!


Student "Blogs" Using Google Slides

Sometimes you'd like your students to do a blogging type project, but not actually have a real blog.  Google Slides is a great tool for this type of activity.  Each slide can be one entry into the blog.  This is particularly wonderful for giving the students a chance to reflect on their learning - something that is so important but often gets lost in the chaos.

I have created a basic template in Google Slides for a "blog" post.  You can click here to get a copy of it.  Here is what the template looks like:


You'll notice a few things...
  • The slide size is set to 8.5 x 11 to mimic a piece of paper.
    • I did this just in case this needs to be printed for any reason.  You can easily change the slide size to be whatever you want it to be, including something like 8.5 x 14 to give them a longer space to "blog" for each entry.  You can view this post for instructions on how to change your slide size.
  • There is a picture across the top. 
    • This mimics a header or banner that you typically find on blogs.  You can easily adjust the size, color, and font of the title or subtitle, adjust the white layer box, and/or switch out the image to meet your needs.  You can also give your students the chance to adjust these features to fit their style if you'd like.
  • There are a few "Click to add text" boxes.
    • I have gone into the master layout of the slide and added in these boxes exactly where I want them.  They are placeholder boxes that give the "Click here to add text" prompt and they will be on all the new slides that you add.   This post about the master slide layout will help you see how.
  • There is a column for evidence of learning. 
    • This is a place where students can insert images of what they are working on to document their progress.  They could also put text boxes here with links to videos, images, audio files, etc. to show how their work is coming along.  This is geared toward a reflection type blog.  You could use this column for whatever you want.  I included a sidebar because blogs typically have some sort of sidebar and I felt it added to the blog feel of the template.  To change the title of "Evidence of Learning", you'll need to go to the master slide layout and edit it there.  
I would typically put the header image, the white layer box, and the blog title into the master layout of the slide as well so that it will show up on each new entry slide the students add.  I didn't do that here, just in case you are working with older students who want to edit the picture and blog title themselves.  This means they will have to paste those header elements onto each new slide they create.  If you are working with younger students, or you just want your older students to have a specific image and blog title, you can put these elements into the background of the master slide so that they cannot be edited on each individual slide.  You can view this post to see instructions on how to edit the master slide layout.

Using Google Slides for a blog activity is great because you can put links to these "blogs" on your class pages or even embed some of them, which makes it easy to showcase the work to parents or other students.  

Thursday, March 22, 2018

Animate with Google Slides

You can use Google Slides to do a lot of things you might not expect.  One of those things is to create animations.  Yes, you read that correctly.  You can animate with Google Slides.  Here's how!

Create an Animation:

Create a slide that sets the scene for your animation.  Like this one:


Then go ahead and start your animation process.  The trick is to move things on the slide just a tiny bit, duplicate the slide, change it a tiny bit more, duplicate again, etc.  To duplicate a slide quickly, click on the slide in the left side panel and then press Command+D (Control+D on PC) or right click on the slide in the left panel and choose "Duplicate slide".  

Watch the arm on the right in these images.  Here is a zoomed in look at my first 4 slides in the animation series:


See how the arm is moved just a tiny bit between each slide?  I moved the arm with the mouse by just changing the angle of that line a little bit on each new slide.  If you are moving an object instead of just changing the angle, you can use the arrow keys to nudge it, or hold shift while you use the arrow keys and it will move just one pixel at a time.  After a few slides, stop and test your animation by clicking on the first slide and then holding down the right arrow key (or the down arrow) and checking on how the movement looks.  If you move items too much between slides, it might look choppy.

Here is how that whole animation turned out:


Publish Your Animation:

There are a few different ways that you can publish your animation.  The way that you saw it above as a Google Slides presentation that is rapidly advancing slides on its own is the easiest.  Here's how:

In your presentation, go to the "File" menu across the top and choose "Publish to the web".


A window will pop up.  You have a few options here, you can set it to automatically start once the player loads and you can have it restart automatically as well (like mine is doing in this post).  Your choice!  Go ahead and leave the 3 second auto-advance setting.  Once you have your options the way you want them, click the "Publish" button.


Once you click "Publish", it will give you a link you can use to send people to your published show.


When you copy and paste the link, change the number at the very end of the URL, it currently 3000.  This is in milliseconds and will automatically change the slides every 3 seconds.  You want them to advance much faster, like a flip book, so change that number to 100.  Try that out and then adjust the number as needed to find the speed you like for your animation.
Another way to publish your animation is to capture it with a screen recording software and then you'll have it as a video you can share.  If you want to put music in the background, you can use something like iMovie, Windows Movie Maker, or Camtasia Studio to edit the video and add the sound.  You can also just upload your animation to YouTube and then add the background music from YouTube's music library.

Examples:

Here is a fun little animation by my friend Jen Roberts (@JenRoberts1):


Here is an example I found in a Matt Miller blog post of some students animating a Scientific Procedure.  Click the image to view the Slides presentation.  I recommend going into present mode and allowing the whole presentation to finish loading before you start it.  There are over 200 slides so it can be very choppy unless you do it that way.  


Animating with Google Slides is simple and fun!  Enjoy!

Wednesday, November 29, 2017

Instagram Template with Google Slides

*Update - See the new updated Instagram Template here.

For better or for worse, students are all over Social Media - so why not give them a little of what they love mixed in with the learning?  My friend Ryan O'Donnell, (@creativeedtech), is quite talented with creating templates and he made an Instagram post template in Google Slides that caught my eye and sparked my imagination.  There are so many fun ways to use this in the classroom!  You can get a copy of his template by clicking the link I provide at the end of this post.  You can also find my updated templates for 2019 and 2022. Here is a glance at what he created:


How could you use this in the classroom, you ask?  Here are a few examples:

Summarizing chapters or sections of a book:
It takes quite a bit of skill to boil a summary down to a few sentences that truly capture the main ideas of a chapter.  Students can create a Slides file from the template where each slide becomes the summary for each section of text you assign.  They will need to choose a screen handle and profile picture that are appropriate for the character they are impersonating.  They will also choose a picture and some text for their "post".  This is an example for Chapter 1 of Charlotte's Web.

Baby pig photo from Michael Kappel

Responding to a historical event:
Students will need to choose a screen handle and picture appropriate for the historical person they are impersonating.  They will find a profile picture and "post" some text. This can be used to summarize an event or show their understanding of an event and/or its importance. 


Animal Study:
Students will take on the perspective of the animal and make posts to show their knowledge of that animal's life, habits, habitat, and diet, etc.  Think of something like "If an iguana had Instagram".  I'll tell you what, I learned quite a bit about Iguanas while creating these "posts" for this example!


Wild Plum photo from Forest and Kim Starr


Some other ideas are:
  • Highlight a scientific discovery or invention
  • Make a post that a book character would make about a certain event from the story if they had an Instagram account and lived in our day and age
  • Make a post to show their knowledge of why a noteworthy person is well known
  • Assume the role of Social Media manager for a specific state and make multiple posts showing the important things about your state, including all the things you might include in a state report


There are so many ways to utilize this type of template.  I'd love to hear how you decide to use it, and so would Ryan!  Feel free to tweet it out and tag us both (@TeachingTechNix and @creativeedtech).

You can get a copy of Ryan's original Instagram template by clicking here and view my 2019 template here.  I've recently updated the template with a new 2022 version, which you can view here. On the page that opens up, click the blue "Use Template" button in the upper right corner.

Check out Ryan's website for more amazing templates for all sorts of fun things.

*If you liked this Instagram template, you might also like my Fake Tweet Template.

Thursday, September 28, 2017

Google Slides: Grid View

There is a new feature in Google Slides and I just can't contain my excitement!  Google has finally added the grid view feature!  This was the last remaining thing I missed from PowerPoint and I'm thrilled Google has given it to us in Slides.

To view your slides in Grid View, click on "View" across the top and choose "Grid view" from the list.  You can also look at the bottom left corner of your Slides window and see the little icons to swap from standard view to grid view.


There are a few more features they just added, like Add-ons and Google Keep integration, that you can read about in this post from Google.  

If you don't see the "Grid view" option in your "View" menu - don't worry.  It is still in the process of rolling out to all domains.  Hang tight and you should see it soon!

Thursday, March 30, 2017

"Tweet" Template with Google Slides

When you can't take your kids to Twitter, take Twitter to your kids!  Often age limits, privacy laws, and school policies prevent you from having your students use Twitter.  This isn't necessarily a bad thing, but sometimes having your students write a tweet works very well with your lesson plan.  After all, summarizing something into a 280 character tweet is more of a skill than you'd think.

There is a 5th grade teacher at my site who wanted her students to form a tweet, so I created a single tweet template in Google Slides.  I edited the master slide so the template became the background of the slide, and the only things the students could edit were the text boxes they needed.  Doing this made it so that they couldn't accidently delete the images in the template.  If you want to see how to edit the master slide - watch this quick video tutorial.

Here is what the template looks like:


We didn't have a ton of time for the activity, so instead of having students take a picture of themselves and put it in the image box, I placed some profile icon choices in the gray workspace around the slide so they could drag and drop the one they wanted to use.

If you'd like to use this template - feel free to click here and get your own copy.  You can edit the master slide to change the date and time on the tweet if you wish.

Happy "tweeting"!

Tuesday, January 26, 2016

Google Slides: Learning Journals

As educators, we all know that reflection is important.  John Dewey said, “We don’t learn from experience. We learn from reflecting on experience.”  It is often difficult to plan time in our busy semesters for this much needed reflection.  Google Slides can help.  Whether it is some sort of a daily or weekly learning journal, reflections on labs or projects, or even reflections for each assignment or chapter, you and your students can use Google Slides to make this process easy and organized.

Students can create a slide presentation at the beginning of the semester.  They will use the same file all the way through.  Each slide becomes one entry in the learning journal.  One day, one assignment, one project, one chapter, etc.  The important thing is to have them date the slides and always keep the most recent slide at the top.  Students can add a new slide and then click on it and drag it to the top to make it slide #1.  This way, when you are looking over their work, the most recent one is always at the top and you don't have to scroll through all the slides to find it.  The size of the slides can be changed to make them larger if your students need to write longer reflections.  You can even make them 8.5 x 11!  Check this post to see how.

You can see a very simple example of a Student Learning Journal created using Google Slides here.

Sometimes we forget that the process is more important than the product.  Building this simple task into your class time or homework routine can ensure that students always take time for reflection.

Google Slides: Choose Your Own Adventure Style

Google Slides is so much more than a presentation tool!  One very fun use for Google Slides, is to have students create a choose your own adventure story.  You can easily link buttons or words on a slide and have them take you to a different slide when you click them.  This will allow the reader of the story to choose their next move and be taken to a specific slide based on that choice.  Imagine the possibilities for this!  There is so much story mapping and critical thinking involved in building a choose your own adventure type story.  Your students will learn, be challenged, and have a ton of fun along the way!

Depending on the age of your students, you may want to leave the slide size as is, or perhaps make it an 8.5 x 11 sized page for more advanced writers who need more space for text.  To see how you can change the default slide size, check out my Google Slides: More Than a Presentation Tool post.

It is easy to hyperlink text or shapes to take you to a certain slide in the slide deck.

Text:
Highlight the text you'd like to link and click on the link icon in the toolbar across the top.  If you don't see the link icon across the top, you may have to click the "More" button to find it.


Shapes:
To link a shape, select the shape that you'd like to link and then click on the link icon across the top.  Again, if the link icon doesn't show, you may have to click the "more" button to find it.


When you click the link icon, you'll see a "Slides in this presentation" option.  You can then pick which slide this text or shape should link to.  Once you choose the slide you'd like to link to, you can click "Apply".

Tip: If you choose a slide layout that includes a 'title' text box, the title will appear next to the slide number in this list.  This might be helpful to ensure you are linking the correct slide.  If you do NOT want the title to show on the slide itself, you can make the text the same color as the background so it cannot be seen on the slide, but the name will still show in this list.


Students can be as creative as they'd like to be as they build their stories.  Once they are finished, the stories can be shared with parents and peers.  Everyone can load up the slide decks and get ready to choose their own adventure!  (Be sure the 'reader' clicks "Present" to launch the slideshow.  The links will work better this way!)

___________________________________
Note:  It is helpful - but not necessary - to make your slides for this presentation in three layers.

Layer 1 (back):  Your story text.

Layer 2 (middle):  The middle layer should be a big rectangle that covers the entire slide.  It should be made to be translucent so you can see through it.  Link this big rectangle to the same slide you put it on.  You do this to prevent any stray clicks from accidentally advancing to the next slide.  There is a video here that explains this process in more detail.

Layer 3 (top):  Then the top layer is your text box or shapes that contain your options.

The purpose of the big transparent rectangle in the middle is to prevent the "reader" from accidentally advancing the slide.  When you are in presentation mode, clicking on the slide will advance you to the next slide.  By adding this transparent layer linked to the same slide, if the "reader" clicks anywhere but on the buttons you give them, it will just stay on that slide.  

Google Slides: More Than A Presentation Tool

Google Slides is Google's slide presentation tool.  I like it - a lot.  It may not include all of the features that PowerPoint has, but it includes plenty of other features to make up for it!  Here are three things about Google Slides you may or may not know:

  • You can find really great presentation themes at www.slidescarnival.com.  You can read my post about it here.  These are free themes you can use, they just ask that you give credit to Slides Carnival.


  • You can change the size of the slides.  This allows you to have a bunch of slides sized 8.5 x 11 for a journal project, or maybe 3 x 5 for a flashcard project, etc.  You can change it to whatever you like.  


                                    To change your slide size, click on "File" across the top and then choose "Page setup".


A window will pop up that lets you choose your desired size.  You can click on the arrows to open a drop down menu with the options.  


You have your standard presentation size options, but you also have an option for "Custom".


The "Custom" option will allow you to state your desired size in inches, centimeters, points, or pixels.  Just click the drop down to change the units.  Click the blue "OK" button after you choose your desired slide size.


Now your slide size is changed and you are ready to create!


  • You can easily edit the shape of your pictures once you insert them into a presentation.  Click on the image you have inserted and then click on the little drop down near the crop button across the top of the screen.  Then you can choose any of the shapes, arrows, callouts, or equation options to reshape your image.  Cool right?! 


I hope this has helped you start to realize that Google Slides does more than you think!

Google Slides Lesson Ideas:
Choose Your Own Adventure Stories
Learning Journals

Monday, September 28, 2015

Get More Themes for Google Slides - Slides Carnival

When I suggest using Google Slides instead of PowerPoint, one complaint I get is that there aren't as many nice design themes.  Students might feel the same way.  It is true that there aren't many design themes native to Google Slides, but there are people who have created some great ones and they don't mind sharing!

Visit the Slides Carnival website and check out all the beautiful and practical Google Slides design themes they offer free of charge.  When you find one you like, you can click on it to bring up a more detailed page about that theme.  Now, Slides Carnival does have some advertising on their page, which I agree is no fun, however it enables them to offer us free themes, so we just learn to navigate around it.  When you want to download the theme, be sure you are clicking on the orange "Use this presentation template" button and not a download button of any kind.  


When you click that button it will take you to a view only Slides presentation.  You can then go to the File menu and choose "Make a copy".  


It will prompt you to name the copy.  I like to name it something that reminds me of what it looks like, so when I want to use it later, I can find it easily.  I also add the words "presentation theme" to the name.  I organize all of my presentation theme files into a folder in my Google Drive because it makes it easier to find the theme I want later.


Once you have your copy, you can close the window and browse for more themes.  When you are ready to use that theme in a presentation, open a new slide show and click on the "Change theme" button across the top.  At the bottom right hand corner of the panel that opens will be an "Import theme" button.  


Type in the words "presentation theme" and all of the slide shows you have named with "presentation theme" in the filename will pop up.  Choose the one you want and click, "Import theme".


Now you can build your presentation using that theme.  When you click on the "Layout" button across the top of the page, you can choose which layout you'd like to use on your slide.  You can also click on the little plus above the slide list.  A short cut is to click the tiny down arrow instead of the plus because it lets you choose which type of slide you'd like to add.  


Happy slide building!

Helping teachers incorporate technology, one tech tip at a time.