Saturday, October 14, 2023

Which One Doesn't Belong?

I love a good "Which One Doesn't Belong?" activity.  Anything to help reinforce the idea that when presented with a problem or a number set, you should always notice and note relationships between numbers before you jump directly to an algorithm.  If you haven't tried Which One Doesn't Belong with your class, you really should - no matter their age. 

For this task, you put up four numbers and ask the students to find the one that doesn't belong.  The numbers should be chosen so that there are many different answers.  Here is a link to more information if you'd like to investigate this further.  You can do this with numbers, shapes, pictures, all sorts of things. I normally do my very first WODB activity with pictures of four different candies that I found here just to help the students understand what we are looking for.

One thing I have to really stress for my young students is that they are focusing on a relationship that three numbers have, but one number doesn't.  I have them phrase their answer like this:

"_____ doesn't belong because the other three all _______________."

This makes it so they don't say things like, "______ because it is the largest."  Sometimes they will say it wrong, but it still works, so I help them rephrase it.  For example, they might say, "________ because it is even."  Then I can help them rephrase it to say, "________ doesn't belong because the other three are all odd." See how it focuses on the relationship between the three that DO belong?  

When they say something that doesn't quite work, or they say something that makes the one number unique but isn't about a relationship between the other three, I always try to make sure and acknowledge that they made a good observation.  That is what this whole thing is about anyway, isn't it?  Noticing things about the numbers?  We have done this enough now that some of them will even say, "I know this isn't a which one doesn't belong, but I noticed ____________."  When you do this often enough, they will catch on.  

I'm writing about this today because I want to do a quick review of area and perimeter next week with my students so I whipped up a quick "Which One Doesn't Belong?" image to show them that has 4 different quadrilaterals with their lengths and widths marked.  I want to emphasize how shapes can have different lengths and widths but still have the same area, so I chose my numbers carefully.  I wanted to share this just in case it was helpful to anyone else.  You can never have too many WODB images in your toolbox.  


A few things students might say about this:

  • The green one doesn't belong because the other three are all rectangles and it is a square. (Yes, I know that a square is also considered a rectangle, but a student will likely say it so it gives you a great chance to talk about what makes a square vs. a rectangle, etc.)
  • The red one doesn't belong because the other three all have at least one even side length.
  • The blue one doesn't belong because the other three all have a length that is greater or equal to the height.  
The fun thing is that sometimes the students will notice things I didn't notice.  They get very good at noticing.  I'm hoping someone notices a reason why the purple one doesn't belong.  I haven't noticed anything yet.  If you notice a reason the purple doesn't belong, put it in the comments.  

I wish you wonderful discussions with your young mathematicians!

Saturday, October 1, 2022

Update to Instagram Template

It was that time again to update my Instagram template.  The last version was 2019 and the 2022 version is just a little bit different.  I hope you enjoy this fresh template!  Tag me on Twitter or Instagram and show me how you use it!

                                                         
There are 6 different slide layouts for you.  A blank one each of the posts and both profiles and then also one of each with instructions on the sides.  Like this:


If you go up to the layout button across the top, you can choose from all six layouts:


You can view the new template by clicking here.  If you'd like to use it, click on the blue "Use Template" button and it will make a copy for you.  You can see my original post about how to use a template like this in the classroom by clicking here.  

Wednesday, April 27, 2022

#MathReps Fractions

I've been exploring #MathReps and I really see the value in them.  (Get it... math...value...😂 Ok sorry. I couldn't resist!)
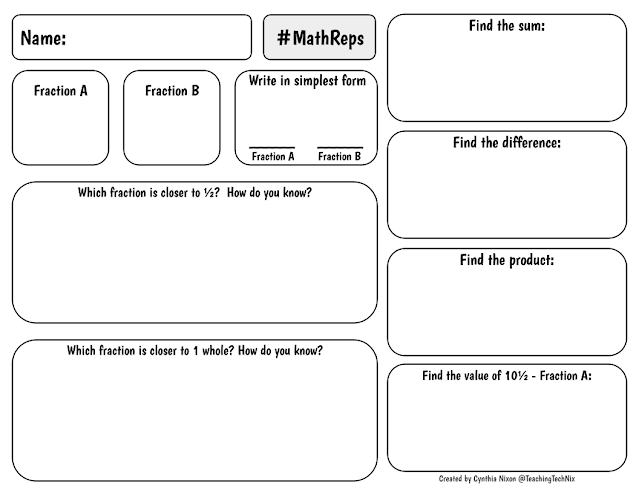
I wanted to do some reps with my students throughout our fraction unit and this is the double-sided rep I created for my team:

Fractions MathRep Page 1
Fractions MathReps Page 2
 
After a while, we wanted something that worked for at least one of the fractions to be a mixed number.  Both could be mixed numbers even, depending on the level of your students.  If this looks like something you might like to use, you can click here to get the PDF which has both versions.  I'd love to hear how they work for your students if you try them!


Saturday, October 2, 2021

Google Classroom Student Selector

Today I had one of those moments when I couldn’t believe I didn’t already know something. I saw this tweet from my friend Hans and I had to go check it out.  When I use classroom, I normally use it from my MacBook and that is why I think I missed this feature.  Regardless of why I didn’t know, as soon as I found out, I decided to share it with all of you.

When you’re using the Google Classroom app on a mobile device (tablet or phone) you can click on the “People” tab and have access to a student selector tool.  This is like a high tech way of pulling sticks.  I’m not a big fan of cold calling kids on a regular basis, but there are a few times when I might want to pull a random student.  There are also times when I need to run down the list of my kids in a random order for one reason or another.  This tool is perfect for that!  You can mark kids absent, skip past students until later, and easily keep track of who has been picked - even if you need to stop and pick the rest another time.  Very handy if you ask me.  Not a tool I’ll use every day, but it is something I will make strategic use of. 

To find this tool, open your Google Classroom App on a mobile device and tap on the “People” tab.  In the upper right corner, you’ll see a little icon that looks like four little squares, but one is tweaked sideways.  Tap that little icon to launch the Student Selector tool.


The first time you tap on this, it will welcome you to the student selector and you can tap “Start” to begin. 


Now you can see a random student.  You have options to mark them absent, call them later, or tap to see the next student. You can also see a rundown on the left side showing how many students have been picked, how many are left, and how many were absent.  If you tap on the X and go out, when you come back, the count will still be there.  To reset the count for another activity, you can tap on the “Reset” button in the upper right corner.


This is a very quick and easy tool integrated into an app you already use - no third party app necessary.  Thanks, Google!

If you want to read more about Google Classroom’s Student Selector tool, you can click here to see Google’s Help Page. 


Thursday, April 29, 2021

Emoji and Symbols Viewer for MacBook

If you teach math or some other subject that requires you to use special symbols or characters frequently, or you just plain love emojis, this post is for you. This is for MacBook as that is what I currently use. I teach 5th grade right now and often create my own math activities. I find I need the multiplication symbol (yes, I know I can use the letter x, but I like the way the actual multiplication symbol looks) and the division symbol quite frequently. This is something I discovered by accident one day, and I'm so glad I did! I use it all the time in a variety of programs.  

The Emoji and Symbols tool allows you to quickly search for emojis or any special symbols or characters by just clicking a button on your menu bar. It is very easy to set up.  

1.  Find the input menu icon on the menu bar in the upper right corner of your screen and click it.  Mine is a US flag because my keyboard is set to US, yours may be different. If you can't find this, you can always skip steps 1-2 here and just go to your system preferences and choose "keyboard".


2.  Choose "Open Keyboard Preferences".
 

3.  Be sure you are on the "Keyboard" tab and click the box that says, "Show keyboard and emoji viewers in menu bar."


Now, whatever program you are working in, you can click on the new input menu icon in the menu bar and choose "Show Emoji & Symbols" and find the symbols you need with just a few clicks.  


I especially love the "Frequently Used" section.  Keeps all the ones I use on a regular basis handy for quick access.  


I hope this is as helpful to you as it has been to me.

Saturday, February 1, 2020

Save Time With Bookmarks: Document Templates

I don't know about you, but I use Google Slides for #allthethings.  I am constantly opening Google Slides and then changing the size of my slides.  I realized, with a simple two minute investment, I can save time and clicks each time I need a Google Slides file sized a certain way.

You can do this with any size, but I am going to show it with the three documents I use the most, 8.5 x 11 portrait and landscape slides as well as a landscape document.  Portrait documents are default so I didn't need a shortcut for that.

Step 1:  Create a folder in your Google Drive and call it something like Templates or Shortcut Templates.  This will give you a place to store these template documents you are about to create so that you remember what they are for.

Step 2:  Create a folder in your bookmarks bar.  You can do this by right clicking on the bookmarks bar and choosing "Add folder".  Name the folder "Templates" or whatever you wish to call it.


Step 3:  Inside the folder in your Google Drive that you designated for the templates, create a new Google Slides file.  Rename the file to be "Portrait Slide" (or whatever you want to call it).

Step 4:  Change the slide size to be 8.5 x 11 to make a portrait slide set.  You can do this by going to File --> Page Setup and choosing Custom.  Then change the units to inches and set it to 8.5 x 11.


Step 5:  Now that you have your portrait sized slides file, click on the little star to the right of the web address in the address bar to create a bookmark for this page.


Step 6: Change the Folder option to be the Templates folder you created in step 2.  Then before you save, click on the "More" button to get more options.


Step 7: Name the bookmark whatever you wish.  Then look at the URL (web address).  At the end of the URL, there will be something that says "/edit...".  It might have some other characters after it, but that is ok.  Change the /edit and everything after it to say "/copy" and then click "Save". See the pictures below.  


Step 8: Now repeat steps 3-7 to create bookmarks for a Slides file that is landscape and a Google Doc that is landscape.

There you have it!  Now whenever you want a Google Slides or Document file that is one of those sizes, you just click on your templates folder on the bookmark bar.


When you click on one of your template shortcut bookmarks, it will prompt you to make a copy of your template. 


Now you'll have your already resized document and be ready to go.  It took a little bit of set up, but so many clicks are saved each time you do this.  Enjoy all your extra seconds.  :)


Thursday, October 31, 2019

Pinterest Template

I have so much fun making templates in Google Slides that when a friend of mine asked for a Pinterest template, I couldn't let the opportunity pass me by.  Here is what I came up with:


and...


As you can see, I made a template for an actual board, and then also one for all the little boards if that is something you might need.  I had a ton of fun with this one.  Thanks, @EdTechAri, for the reason to have a little fun with Google Slides. 

Click here to get a copy of the template.  Just click on the blue "Use Template" button in the upper right.  

Click here and here to learn more about editing the Master Slide, which you might want if you need to edit the portions of the template that are hidden in the background.

If you find a fun way to use this template, I'd love to hear about it in the comments.  


Helping teachers incorporate technology, one tech tip at a time.