Thursday, October 31, 2019

Pinterest Template

I have so much fun making templates in Google Slides that when a friend of mine asked for a Pinterest template, I couldn't let the opportunity pass me by.  Here is what I came up with:


and...


As you can see, I made a template for an actual board, and then also one for all the little boards if that is something you might need.  I had a ton of fun with this one.  Thanks, @EdTechAri, for the reason to have a little fun with Google Slides. 

Click here to get a copy of the template.  Just click on the blue "Use Template" button in the upper right.  

Click here and here to learn more about editing the Master Slide, which you might want if you need to edit the portions of the template that are hidden in the background.

If you find a fun way to use this template, I'd love to hear about it in the comments.  


Thursday, April 4, 2019

Google Slides: Insert a Video

With just a few clicks, you can insert a video from YouTube or from your Google Drive into a Google Slides presentation.

  1. Open up a Google Slides presentation.
  2. Click on the "Insert" menu and choose "Video" from the list.
  3. Choose where the video comes from.  Are you going to run a YouTube search, paste in a YouTube URL, or search for the video in your Google Drive?  Choose the correct tab for your choice.  
  4. Click on the video you wish to use and click on the "Select" button.


If you use a video from your Google Drive, remember to adjust the sharing settings on the video file itself so that others who view your presentation can also view the video.

Google Docs: Insert a Video into a Google Doc

When it comes to being creative with using Google Docs in the classroom, like when I make Hyperdocs, I was always bummed that I couldn't insert a video right into my Google Doc. Then I learned this little hack to make it work.  It is a little bit of a workaround, but it gets the job done.


Step 1:  Get Your Video URL

  • Find the YouTube video you'd like to insert.
  • Click on the "Share" button below the video.
  • Copy the URL for the video by clicking on the "Copy" link. 


Step 2:  Insert Your Video into a Google Slides Presentation

  • Open a new Google Slides presentation.
  • Click on the "Insert" menu and choose "Video".
  • Select "By URL" and paste in your link.
  • Click "Select" and it will insert your video on the slide.


Step 3: Copy Your Video
  • On the Google Slide, click on the inserted video to select it.
  • Press command+C on a Mac, or Ctrl+C on a PC or Chromebook, to copy the video.  DON'T use right click and copy. 

Step 4: Insert Your Video in the Google Doc
  • Place your cursor into the Google Doc wherever you'd like the video to be.  
  • Click on the "Insert" menu and choose "Drawing" and "New".

  • Click in the Google Drawing window that opens up and press Command+V on a Mac, or Ctrl+V on a PC or Chromebook, to paste the video.  Right click and paste will not work.
  • You can resize and position the video however you'd like it.  Normally I make it a little larger by dragging on one of the corner arrows and then I right click and center it horizontally and vertically.  You could even add some credit line text under the video if needed.


  • Click "Save and Close" and the video will now be in your Google Doc.  You can adjust the size and positioning of the video in the same way you would an image.


I always give the instructions for viewing the video right in my document.  They will need to either double click on the video to open it up or click it once and then click on the "Edit" link that pops up.  Then they can click the video to start play.  I have had the double click not work for me in the past, so I always double check before I enter the instructions.

Reminder: Because they have to open up the little drawing in order to watch the video, they must have edit access to the document in order to watch.  People with view-only access will not be able to view the video.  

Hopefully, this tip is helpful for you! I know I use it all the time when making HyperDocs.


Thursday, March 28, 2019

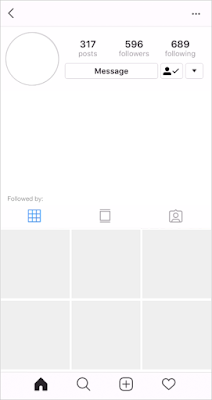
Updated Instagram Template for Google Slides

So many of you have loved my Instagram Template post, that I thought I'd give it a little updating.  I created a brand new template to match the newest version of Instagram.  I have included the template for an Instagram post, as well as two different templates for an Instagram profile page.  Here are some images of the new template:


There are 6 different slide layouts for you.  A blank one each of the post and both profiles and then also one of each with instructions on the sides.  Like this:


If you go up to the layout button across the top, you can choose from all six layouts:


You can view the template by clicking here.  If you'd like to use it, click on the blue "Use Template" button and it will make a copy for you.  You can see my original post about how to use a template like this in the classroom by clicking here.  

Tuesday, January 8, 2019

Google Forms: Which Link Do I Give Students?

When it comes to Google Forms, a question I get often is, "Which link do I give the students?"  There are a few ways to find the link to give your students (or whomever else might be filling out your form).

Preview Link
When you are ready to send out your form, click on the preview icon (the eyeball) at top of the screen.


This will take you to a live preview of the form.  You can then copy the URL from the address bar and give this URL to your students on the class page, or as an assignment, in an email, etc.  (If you are going to do an email - it's a good idea to make a hyperlink instead of pasting the long ugly URL.  Click here to see how if you are unsure.)  


Send Button
You can also get the link by clicking on the "Send" button across the top of the screen.  


Clicking "Send" will take you to a window with a variety of options for distributing your form.  Be sure to click over to the link section by clicking on the chain link icon.  Then you can click "Copy" to copy the URL to your clipboard.  You can then go and paste it where ever it needs to go (Classroom webpage, assignment, email, etc.). 


Helping teachers incorporate technology, one tech tip at a time.