Saturday, October 14, 2023

Which One Doesn't Belong?

I love a good "Which One Doesn't Belong?" activity.  Anything to help reinforce the idea that when presented with a problem or a number set, you should always notice and note relationships between numbers before you jump directly to an algorithm.  If you haven't tried Which One Doesn't Belong with your class, you really should - no matter their age. 

For this task, you put up four numbers and ask the students to find the one that doesn't belong.  The numbers should be chosen so that there are many different answers.  Here is a link to more information if you'd like to investigate this further.  You can do this with numbers, shapes, pictures, all sorts of things. I normally do my very first WODB activity with pictures of four different candies that I found here just to help the students understand what we are looking for.

One thing I have to really stress for my young students is that they are focusing on a relationship that three numbers have, but one number doesn't.  I have them phrase their answer like this:

"_____ doesn't belong because the other three all _______________."

This makes it so they don't say things like, "______ because it is the largest."  Sometimes they will say it wrong, but it still works, so I help them rephrase it.  For example, they might say, "________ because it is even."  Then I can help them rephrase it to say, "________ doesn't belong because the other three are all odd." See how it focuses on the relationship between the three that DO belong?  

When they say something that doesn't quite work, or they say something that makes the one number unique but isn't about a relationship between the other three, I always try to make sure and acknowledge that they made a good observation.  That is what this whole thing is about anyway, isn't it?  Noticing things about the numbers?  We have done this enough now that some of them will even say, "I know this isn't a which one doesn't belong, but I noticed ____________."  When you do this often enough, they will catch on.  

I'm writing about this today because I want to do a quick review of area and perimeter next week with my students so I whipped up a quick "Which One Doesn't Belong?" image to show them that has 4 different quadrilaterals with their lengths and widths marked.  I want to emphasize how shapes can have different lengths and widths but still have the same area, so I chose my numbers carefully.  I wanted to share this just in case it was helpful to anyone else.  You can never have too many WODB images in your toolbox.  


A few things students might say about this:

  • The green one doesn't belong because the other three are all rectangles and it is a square. (Yes, I know that a square is also considered a rectangle, but a student will likely say it so it gives you a great chance to talk about what makes a square vs. a rectangle, etc.)
  • The red one doesn't belong because the other three all have at least one even side length.
  • The blue one doesn't belong because the other three all have a length that is greater or equal to the height.  
The fun thing is that sometimes the students will notice things I didn't notice.  They get very good at noticing.  I'm hoping someone notices a reason why the purple one doesn't belong.  I haven't noticed anything yet.  If you notice a reason the purple doesn't belong, put it in the comments.  

I wish you wonderful discussions with your young mathematicians!

Saturday, October 1, 2022

Update to Instagram Template

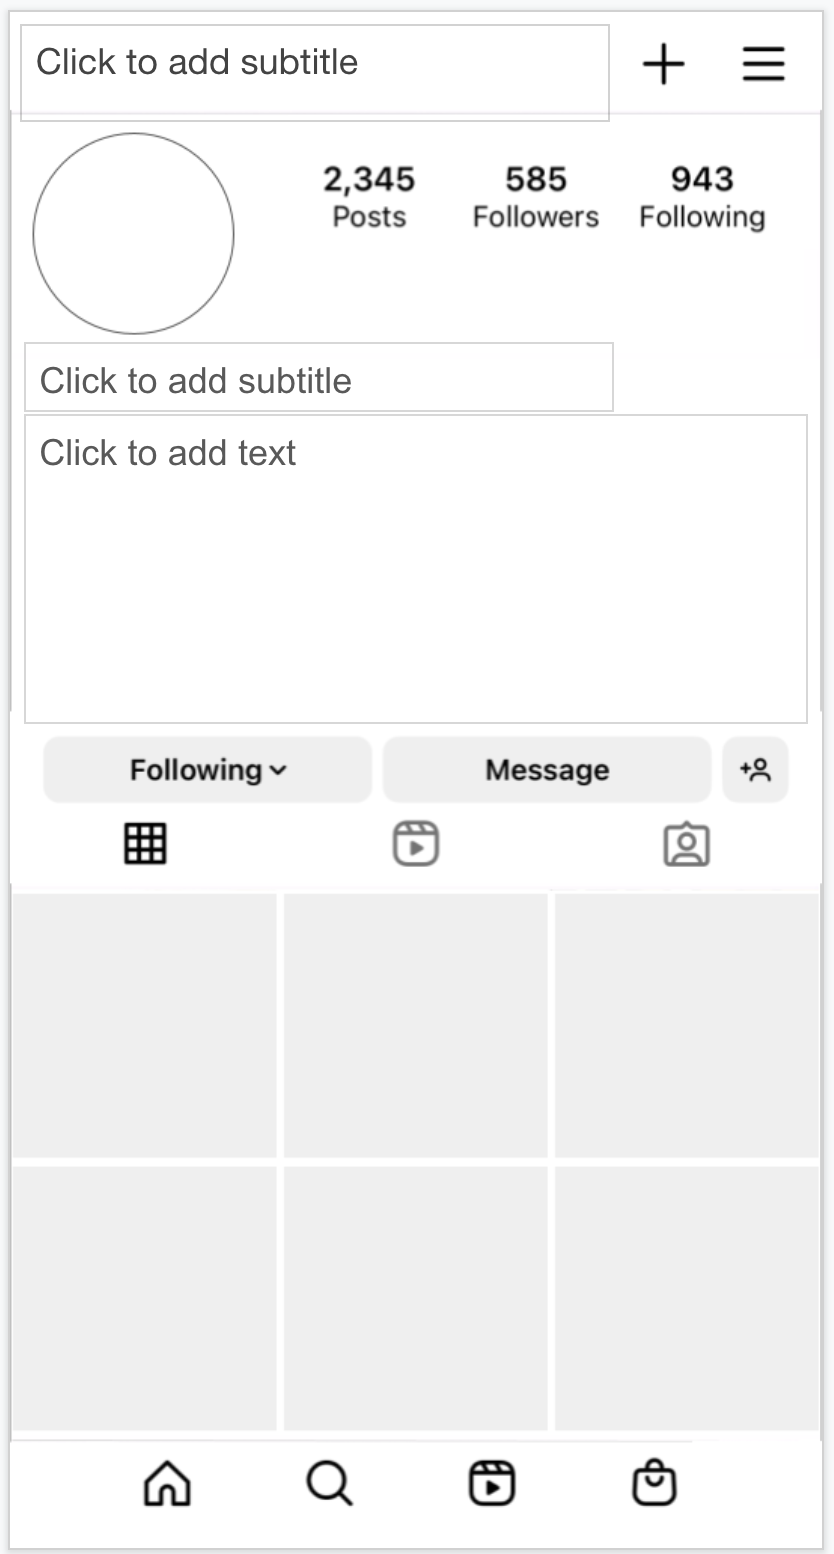
It was that time again to update my Instagram template.  The last version was 2019 and the 2022 version is just a little bit different.  I hope you enjoy this fresh template!  Tag me on Twitter or Instagram and show me how you use it!

                                                         
There are 6 different slide layouts for you.  A blank one each of the posts and both profiles and then also one of each with instructions on the sides.  Like this:


If you go up to the layout button across the top, you can choose from all six layouts:


You can view the new template by clicking here.  If you'd like to use it, click on the blue "Use Template" button and it will make a copy for you.  You can see my original post about how to use a template like this in the classroom by clicking here.  

Wednesday, April 27, 2022

#MathReps Fractions

I've been exploring #MathReps and I really see the value in them.  (Get it... math...value...😂 Ok sorry. I couldn't resist!)
I wanted to do some reps with my students throughout our fraction unit and this is the double-sided rep I created for my team:

Fractions MathRep Page 1
Fractions MathReps Page 2
 
After a while, we wanted something that worked for at least one of the fractions to be a mixed number.  Both could be mixed numbers even, depending on the level of your students.  If this looks like something you might like to use, you can click here to get the PDF which has both versions.  I'd love to hear how they work for your students if you try them!


Saturday, October 2, 2021

Google Classroom Student Selector

Today I had one of those moments when I couldn’t believe I didn’t already know something. I saw this tweet from my friend Hans and I had to go check it out.  When I use classroom, I normally use it from my MacBook and that is why I think I missed this feature.  Regardless of why I didn’t know, as soon as I found out, I decided to share it with all of you.

When you’re using the Google Classroom app on a mobile device (tablet or phone) you can click on the “People” tab and have access to a student selector tool.  This is like a high tech way of pulling sticks.  I’m not a big fan of cold calling kids on a regular basis, but there are a few times when I might want to pull a random student.  There are also times when I need to run down the list of my kids in a random order for one reason or another.  This tool is perfect for that!  You can mark kids absent, skip past students until later, and easily keep track of who has been picked - even if you need to stop and pick the rest another time.  Very handy if you ask me.  Not a tool I’ll use every day, but it is something I will make strategic use of. 

To find this tool, open your Google Classroom App on a mobile device and tap on the “People” tab.  In the upper right corner, you’ll see a little icon that looks like four little squares, but one is tweaked sideways.  Tap that little icon to launch the Student Selector tool.


The first time you tap on this, it will welcome you to the student selector and you can tap “Start” to begin. 


Now you can see a random student.  You have options to mark them absent, call them later, or tap to see the next student. You can also see a rundown on the left side showing how many students have been picked, how many are left, and how many were absent.  If you tap on the X and go out, when you come back, the count will still be there.  To reset the count for another activity, you can tap on the “Reset” button in the upper right corner.


This is a very quick and easy tool integrated into an app you already use - no third party app necessary.  Thanks, Google!

If you want to read more about Google Classroom’s Student Selector tool, you can click here to see Google’s Help Page. 


Thursday, April 29, 2021

Emoji and Symbols Viewer for MacBook

If you teach math or some other subject that requires you to use special symbols or characters frequently, or you just plain love emojis, this post is for you. This is for MacBook as that is what I currently use. I teach 5th grade right now and often create my own math activities. I find I need the multiplication symbol (yes, I know I can use the letter x, but I like the way the actual multiplication symbol looks) and the division symbol quite frequently. This is something I discovered by accident one day, and I'm so glad I did! I use it all the time in a variety of programs.  

The Emoji and Symbols tool allows you to quickly search for emojis or any special symbols or characters by just clicking a button on your menu bar. It is very easy to set up.  

1.  Find the input menu icon on the menu bar in the upper right corner of your screen and click it.  Mine is a US flag because my keyboard is set to US, yours may be different. If you can't find this, you can always skip steps 1-2 here and just go to your system preferences and choose "keyboard".


2.  Choose "Open Keyboard Preferences".
 

3.  Be sure you are on the "Keyboard" tab and click the box that says, "Show keyboard and emoji viewers in menu bar."


Now, whatever program you are working in, you can click on the new input menu icon in the menu bar and choose "Show Emoji & Symbols" and find the symbols you need with just a few clicks.  


I especially love the "Frequently Used" section.  Keeps all the ones I use on a regular basis handy for quick access.  


I hope this is as helpful to you as it has been to me.

Saturday, February 1, 2020

Save Time With Bookmarks: Document Templates

I don't know about you, but I use Google Slides for #allthethings.  I am constantly opening Google Slides and then changing the size of my slides.  I realized, with a simple two minute investment, I can save time and clicks each time I need a Google Slides file sized a certain way.

You can do this with any size, but I am going to show it with the three documents I use the most, 8.5 x 11 portrait and landscape slides as well as a landscape document.  Portrait documents are default so I didn't need a shortcut for that.

Step 1:  Create a folder in your Google Drive and call it something like Templates or Shortcut Templates.  This will give you a place to store these template documents you are about to create so that you remember what they are for.

Step 2:  Create a folder in your bookmarks bar.  You can do this by right clicking on the bookmarks bar and choosing "Add folder".  Name the folder "Templates" or whatever you wish to call it.


Step 3:  Inside the folder in your Google Drive that you designated for the templates, create a new Google Slides file.  Rename the file to be "Portrait Slide" (or whatever you want to call it).

Step 4:  Change the slide size to be 8.5 x 11 to make a portrait slide set.  You can do this by going to File --> Page Setup and choosing Custom.  Then change the units to inches and set it to 8.5 x 11.


Step 5:  Now that you have your portrait sized slides file, click on the little star to the right of the web address in the address bar to create a bookmark for this page.


Step 6: Change the Folder option to be the Templates folder you created in step 2.  Then before you save, click on the "More" button to get more options.


Step 7: Name the bookmark whatever you wish.  Then look at the URL (web address).  At the end of the URL, there will be something that says "/edit...".  It might have some other characters after it, but that is ok.  Change the /edit and everything after it to say "/copy" and then click "Save". See the pictures below.  


Step 8: Now repeat steps 3-7 to create bookmarks for a Slides file that is landscape and a Google Doc that is landscape.

There you have it!  Now whenever you want a Google Slides or Document file that is one of those sizes, you just click on your templates folder on the bookmark bar.


When you click on one of your template shortcut bookmarks, it will prompt you to make a copy of your template. 


Now you'll have your already resized document and be ready to go.  It took a little bit of set up, but so many clicks are saved each time you do this.  Enjoy all your extra seconds.  :)


Thursday, October 31, 2019

Pinterest Template

I have so much fun making templates in Google Slides that when a friend of mine asked for a Pinterest template, I couldn't let the opportunity pass me by.  Here is what I came up with:


and...


As you can see, I made a template for an actual board, and then also one for all the little boards if that is something you might need.  I had a ton of fun with this one.  Thanks, @EdTechAri, for the reason to have a little fun with Google Slides. 

Click here to get a copy of the template.  Just click on the blue "Use Template" button in the upper right.  

Click here and here to learn more about editing the Master Slide, which you might want if you need to edit the portions of the template that are hidden in the background.

If you find a fun way to use this template, I'd love to hear about it in the comments.  


Thursday, April 4, 2019

Google Slides: Insert a Video

With just a few clicks, you can insert a video from YouTube or from your Google Drive into a Google Slides presentation.

  1. Open up a Google Slides presentation.
  2. Click on the "Insert" menu and choose "Video" from the list.
  3. Choose where the video comes from.  Are you going to run a YouTube search, paste in a YouTube URL, or search for the video in your Google Drive?  Choose the correct tab for your choice.  
  4. Click on the video you wish to use and click on the "Select" button.


If you use a video from your Google Drive, remember to adjust the sharing settings on the video file itself so that others who view your presentation can also view the video.

Google Docs: Insert a Video into a Google Doc

When it comes to being creative with using Google Docs in the classroom, like when I make Hyperdocs, I was always bummed that I couldn't insert a video right into my Google Doc. Then I learned this little hack to make it work.  It is a little bit of a workaround, but it gets the job done.


Step 1:  Get Your Video URL

  • Find the YouTube video you'd like to insert.
  • Click on the "Share" button below the video.
  • Copy the URL for the video by clicking on the "Copy" link. 


Step 2:  Insert Your Video into a Google Slides Presentation

  • Open a new Google Slides presentation.
  • Click on the "Insert" menu and choose "Video".
  • Select "By URL" and paste in your link.
  • Click "Select" and it will insert your video on the slide.


Step 3: Copy Your Video
  • On the Google Slide, click on the inserted video to select it.
  • Press command+C on a Mac, or Ctrl+C on a PC or Chromebook, to copy the video.  DON'T use right click and copy. 

Step 4: Insert Your Video in the Google Doc
  • Place your cursor into the Google Doc wherever you'd like the video to be.  
  • Click on the "Insert" menu and choose "Drawing" and "New".

  • Click in the Google Drawing window that opens up and press Command+V on a Mac, or Ctrl+V on a PC or Chromebook, to paste the video.  Right click and paste will not work.
  • You can resize and position the video however you'd like it.  Normally I make it a little larger by dragging on one of the corner arrows and then I right click and center it horizontally and vertically.  You could even add some credit line text under the video if needed.


  • Click "Save and Close" and the video will now be in your Google Doc.  You can adjust the size and positioning of the video in the same way you would an image.


I always give the instructions for viewing the video right in my document.  They will need to either double click on the video to open it up or click it once and then click on the "Edit" link that pops up.  Then they can click the video to start play.  I have had the double click not work for me in the past, so I always double check before I enter the instructions.

Reminder: Because they have to open up the little drawing in order to watch the video, they must have edit access to the document in order to watch.  People with view-only access will not be able to view the video.  

Hopefully, this tip is helpful for you! I know I use it all the time when making HyperDocs.


Thursday, March 28, 2019

Updated Instagram Template for Google Slides

So many of you have loved my Instagram Template post, that I thought I'd give it a little updating.  I created a brand new template to match the newest version of Instagram.  I have included the template for an Instagram post, as well as two different templates for an Instagram profile page.  Here are some images of the new template:


There are 6 different slide layouts for you.  A blank one each of the post and both profiles and then also one of each with instructions on the sides.  Like this:


If you go up to the layout button across the top, you can choose from all six layouts:


You can view the template by clicking here.  If you'd like to use it, click on the blue "Use Template" button and it will make a copy for you.  You can see my original post about how to use a template like this in the classroom by clicking here.  

Tuesday, January 8, 2019

Google Forms: Which Link Do I Give Students?

When it comes to Google Forms, a question I get often is, "Which link do I give the students?"  There are a few ways to find the link to give your students (or whomever else might be filling out your form).

Preview Link
When you are ready to send out your form, click on the preview icon (the eyeball) at top of the screen.


This will take you to a live preview of the form.  You can then copy the URL from the address bar and give this URL to your students on the class page, or as an assignment, in an email, etc.  (If you are going to do an email - it's a good idea to make a hyperlink instead of pasting the long ugly URL.  Click here to see how if you are unsure.)  


Send Button
You can also get the link by clicking on the "Send" button across the top of the screen.  


Clicking "Send" will take you to a window with a variety of options for distributing your form.  Be sure to click over to the link section by clicking on the chain link icon.  Then you can click "Copy" to copy the URL to your clipboard.  You can then go and paste it where ever it needs to go (Classroom webpage, assignment, email, etc.). 


Wednesday, November 28, 2018

Sketchnoting - Yes, You Can!

Several years ago, I would see sketchnotes come across my social media feed and think, "Wow, that's incredible.  I wish I could draw." I wasn't an artist, how could I possibly be expected to draw things on my notes? Notes by Sylvia Duckworth and Wanda Terral would scroll by on my Twitter feed while I sighed longingly, wishing I could create beautiful and useful images like those. You see, I knew that images were powerful and that they would improve my learning, I just didn't think I was capable enough or talented enough to give it a try. After having conversations with many others about sketchnoting, I'm positive that I wasn't alone. Too many people think that they aren't artistic enough to make sketchnotes. Guess what? That's a lie. A big one! It may be true that you aren't very artistic. It may be true that you don't draw well. I certainly didn't. However that doesn't mean that you can't sketchnote. You can. Everyone can.

Now, will everyone's sketchnotes turn out like Sylvia's or Wanda's notes? No, of course not, but they don't need to! Sketchnotes are first and foremost for the person who creates them. They help the person taking notes to make deeper connections to the content and to solidify the information in his/her brain. They don’t have to be amazing and frame-worthy every time. I guarantee you that if you give it a try, and stick with it a bit, you'll surprise yourself. It takes some time to develop your style and find what works for you, but it is so worth it. Sketchnotes are so powerful! When I sketch, I retain the content so much more than when I used to jot notes in a notebook or type them in a document on the computer. I can close my eyes and think of a conference session I attended or book that I read and see the colors I used in my sketchnote. I can recall the images and icons and even some of the main ideas just from the memory of my sketchnote. The gain is worth the risk.

For me, it took getting an iPad where I could draw and then quickly hit undo and try again. That gave me the confidence to go ahead and take the risk and try it out. After a while, I got involved with a community called #Sketch50 on Twitter which helped me practice and experiment with sketching. Eventually that led me me starting the #SketchCUE event which you can read more about here. In honor of the second annual #Sketch50 event in April 2018, I made a short video that chronicles my Sketchnoting journey. I hope you find it inspiring.


I want to challenge you to give Sketchnoting a try. Start simple - choose a black pen/pencil/marker and one color. Practice with some simple shapes or sketch your favorite quote. Write the words in black and then try to add some emphasis to the important words by changing the size or font or color. Allow your creative juices to flow - you have them even if you think you don’t. Trust me, I was the person who said I could never sketchnote because I wasn’t an artist. Get on Twitter and check out #Sketch50 or check out their website at sketch50.org. Take a look at the slides from the beginning sketchnotes session I run called The Power of Sketch and try out some of the prompts. In whatever way you are comfortable - pick up a pen or a stylus, lean into your growth mindset, and start sketching.  

Sunday, October 14, 2018

Google Drive: Update Your File Versions

With a Google Doc, Slide, Form, Sheet, or Drawing in Drive, it is easy to go in and make changes - even if you have already shared the link with someone.  The links you share out take the user to the live document - meaning they automatically see any updates or changes you might make.  That's fantastic!  However, what do you do if you need to update a PDF, image, video, or audio file after you've shared the link?  Google has a solution for that too!

If you need to update a video, audio, image, or PDF file in Google Drive - but you want to maintain the same link for the file because you've already sent it out, just right click on the file in your Google Drive and choose "Manage versions" from the list. 


Now you have several options.  You can see all the versions of your file as well as a button to upload a new file.  If you click on the three dots menu for each version, you have the ability to delete, download, or keep forever.  Generally, versions older than 30 days will delete automatically.  If you want to keep an old version for some reason, be sure to go in and tell it to 'keep forever'.  


Now you can upload a new version of your file, or even a brand new file if you wanted, and keep the same URL link.  This can come in very handy if you noticed a mistake in a file you have already shared out, or if you need to update your file with new or updated information.  

Saturday, May 19, 2018

Student Made eBooks with Google Slides

Google Slides is not just for presentations - it does so many things!  One thing you might not expect to be able to do with Google Slides is make eBooks.  Guess what?  You can!  The best part is that it's very easy for you and your students to create beautiful looking eBooks using Slides.

eBooks can be a great activity for many purposes at any time of the year, but can often come in handy as an end of the year review project.  With Google Slides, students can be creative with their images, fonts, and even embed videos or other web links into their eBooks. When students are finished creating the books, they can embed the Slides files in a digital portfolio or other class website.  They can even download the Slides file as a PDF and now they have a book anyone can read on any device!

Here are a few very simple templates I made using Google Slides that you and your students are welcome to use.  They can add to them and get as creative as they would like.  Click on the links below to view the templates.  To use the template as your own, click the blue "Use Template" button in the upper right.

eBook Dark - Landscape
eBook Light - Landscape
eBook Dark - Portrait
eBook Light - Portrait 

eBook Activity Ideas:
  • Creative Writing/Fiction - example embedded below
  • Historical Fiction 
  • Informational Pamphlet
  • Non-Fiction Book (Great for science and Social Studies topics, reviewing animals, space, chemical and physical reactions, historical events, places, and people, etc.)
  • A book of story problems complete with answer key
  • Poetry
Creative Writing/Fiction eBook Example


Be sure to check out a few of my other posts about creative ways to use Google Slides!

Saturday, March 24, 2018

Quick and Easy Assessments with Google Forms

Making assessments with Google Forms is quick and easy - no really!  I promise!  Google Forms will automatically grade multiple choice and fill in the blank questions while allowing you to quickly and easily add or adjust points for longer answers or fill in the blank answers that might have been just a little off.  You can share the grades with the students immediately if it is all multiple choice, or send feedback to them later as an email.

Google Forms may sound daunting, but it really is so easy to use!  My Google Forms 101 post can help you learn more about making a Google Form, sending it out to students, and handling the results.

The video below shows specifically how to make a self-grading quiz using Google Forms.  It shows the different question types you can use and explains how the answer key works.  You'll also learn how to view the responses and enter scores for questions it can't grade automatically.  Between these two resources, you have everything you need to start building Assessments with Google Forms.

Friday, March 23, 2018

Google Slides: Using Theme Builder

Sometimes you want students to have a specific layout in their presentation, or perhaps there are certain shapes, images, graphic organizers, etc. that you'd like to have in the background of a Slides presentation for the students to use as an assignment template - Venn Diagram, specific questions you want to be answered in a certain area of the slide, etc.  This can all be done easily by editing the theme of your slide deck, which holds all the master layouts.  Anything you place in the Theme Builder slides will become part of the background of the slide and students can't accidentally delete it.  You can even choose the default font style, size, and color.  Watch this short video to see how.  Then let your imagination run wild with possibilities!


Student "Blogs" Using Google Slides

Sometimes you'd like your students to do a blogging type project, but not actually have a real blog.  Google Slides is a great tool for this type of activity.  Each slide can be one entry into the blog.  This is particularly wonderful for giving the students a chance to reflect on their learning - something that is so important but often gets lost in the chaos.

I have created a basic template in Google Slides for a "blog" post.  You can click here to get a copy of it.  Here is what the template looks like:


You'll notice a few things...
  • The slide size is set to 8.5 x 11 to mimic a piece of paper.
    • I did this just in case this needs to be printed for any reason.  You can easily change the slide size to be whatever you want it to be, including something like 8.5 x 14 to give them a longer space to "blog" for each entry.  You can view this post for instructions on how to change your slide size.
  • There is a picture across the top. 
    • This mimics a header or banner that you typically find on blogs.  You can easily adjust the size, color, and font of the title or subtitle, adjust the white layer box, and/or switch out the image to meet your needs.  You can also give your students the chance to adjust these features to fit their style if you'd like.
  • There are a few "Click to add text" boxes.
    • I have gone into the master layout of the slide and added in these boxes exactly where I want them.  They are placeholder boxes that give the "Click here to add text" prompt and they will be on all the new slides that you add.   This post about the master slide layout will help you see how.
  • There is a column for evidence of learning. 
    • This is a place where students can insert images of what they are working on to document their progress.  They could also put text boxes here with links to videos, images, audio files, etc. to show how their work is coming along.  This is geared toward a reflection type blog.  You could use this column for whatever you want.  I included a sidebar because blogs typically have some sort of sidebar and I felt it added to the blog feel of the template.  To change the title of "Evidence of Learning", you'll need to go to the master slide layout and edit it there.  
I would typically put the header image, the white layer box, and the blog title into the master layout of the slide as well so that it will show up on each new entry slide the students add.  I didn't do that here, just in case you are working with older students who want to edit the picture and blog title themselves.  This means they will have to paste those header elements onto each new slide they create.  If you are working with younger students, or you just want your older students to have a specific image and blog title, you can put these elements into the background of the master slide so that they cannot be edited on each individual slide.  You can view this post to see instructions on how to edit the master slide layout.

Using Google Slides for a blog activity is great because you can put links to these "blogs" on your class pages or even embed some of them, which makes it easy to showcase the work to parents or other students.  

Thursday, March 22, 2018

Animate with Google Slides

You can use Google Slides to do a lot of things you might not expect.  One of those things is to create animations.  Yes, you read that correctly.  You can animate with Google Slides.  Here's how!

Create an Animation:

Create a slide that sets the scene for your animation.  Like this one:


Then go ahead and start your animation process.  The trick is to move things on the slide just a tiny bit, duplicate the slide, change it a tiny bit more, duplicate again, etc.  To duplicate a slide quickly, click on the slide in the left side panel and then press Command+D (Control+D on PC) or right click on the slide in the left panel and choose "Duplicate slide".  

Watch the arm on the right in these images.  Here is a zoomed in look at my first 4 slides in the animation series:


See how the arm is moved just a tiny bit between each slide?  I moved the arm with the mouse by just changing the angle of that line a little bit on each new slide.  If you are moving an object instead of just changing the angle, you can use the arrow keys to nudge it, or hold shift while you use the arrow keys and it will move just one pixel at a time.  After a few slides, stop and test your animation by clicking on the first slide and then holding down the right arrow key (or the down arrow) and checking on how the movement looks.  If you move items too much between slides, it might look choppy.

Here is how that whole animation turned out:


Publish Your Animation:

There are a few different ways that you can publish your animation.  The way that you saw it above as a Google Slides presentation that is rapidly advancing slides on its own is the easiest.  Here's how:

In your presentation, go to the "File" menu across the top and choose "Publish to the web".


A window will pop up.  You have a few options here, you can set it to automatically start once the player loads and you can have it restart automatically as well (like mine is doing in this post).  Your choice!  Go ahead and leave the 3 second auto-advance setting.  Once you have your options the way you want them, click the "Publish" button.


Once you click "Publish", it will give you a link you can use to send people to your published show.


When you copy and paste the link, change the number at the very end of the URL, it currently 3000.  This is in milliseconds and will automatically change the slides every 3 seconds.  You want them to advance much faster, like a flip book, so change that number to 100.  Try that out and then adjust the number as needed to find the speed you like for your animation.
Another way to publish your animation is to capture it with a screen recording software and then you'll have it as a video you can share.  If you want to put music in the background, you can use something like iMovie, Windows Movie Maker, or Camtasia Studio to edit the video and add the sound.  You can also just upload your animation to YouTube and then add the background music from YouTube's music library.

Examples:

Here is a fun little animation by my friend Jen Roberts (@JenRoberts1):


Here is an example I found in a Matt Miller blog post of some students animating a Scientific Procedure.  Click the image to view the Slides presentation.  I recommend going into present mode and allowing the whole presentation to finish loading before you start it.  There are over 200 slides so it can be very choppy unless you do it that way.  


Animating with Google Slides is simple and fun!  Enjoy!

Helping teachers incorporate technology, one tech tip at a time.